April 07, 2005
Let's get cookin'
It's spring. The dogwoods and wisteria are all in bloom, and that nasty pine pollen has coated the town of Chapel Hill in a post-victory yellow dust. Blecch. I need to wash my car.....
Anyway, one of the things I love in the spring is a good pasta primavera with all of the veggies and herbs that are just starting to come in fresh. Here's a wonderful recipe from the Better Homes and Gardens cookbook. It's great because you use packaged pasta and refrigerated alfredo sauce (makes it super quick!)
Rotini and Sweet Pepper Primavera
14 oz Asparagus spears
8 oz dried rotini or gemelli (I prefer gemelli)
1 large sweet red or yellow bell pepper, cut into 1 inch pieces
1 cup halved baby pattypan, or chopped summer, yellowneck, or zucchini squash (I like to use a mix of them)
1 10 oz container refrigerated light/low fat (or regular if you like) Alfredo sauce
2 Tbsp snipped fresh tarragon or thyme
1/4 tsp crushed red pepper
1. Snap off and discard woody bases from asparagus spears. Bias-slice (diagonally) asparagus into 1-inch pieces.
2. Cook pasta according to package directions, adding asparagus, sweet bell pepper and squash too pasta for the last 3 minutes of cooking. Drain, return pasta and vegetable mixture to hot pan.
3. Meanwhile, for sauce, in a small saucepan combine alfredo sauce, tarragon or thyme and red pepper. Cook and stir over medium heat about 5 minutes or until heated through. Pour sauce over pasta and vegetables; stir gently to coat. If desired, garnish with fresh herbs and/or grated parmesan cheese.
prep time:20 minutes start to finish, serves 4.
April 08, 2005
Down Under Carnival
The first ever Carnival of the Recipes from Australia!
Amanda of Aussie Wife hosts the 34th Carnival of the Recipes!
Everything looks so yummy!
On a related note, the CotR will be hosted by Drew of Conservative Friends next week, and it will be here in 3 weeks (April 29th)! Mark your calendars
April 13, 2005
Dessert time!
For this week's Carnival of the Recipes, here's a favorite in my family. The Caltechmom is diabetic, so sugar-free is frequently on the menu. This recipe is a twist on the traditional apple pie.
Caltechmom's Nearly Sugar Free Apple Pie
1 large pkg. Cook 'n' Serve (NOT instant) Vanilla Pudding mix
1 1/2 cup unsweetened apple juice
1 1/2 tsp Cinnamon
1- 1 1/2 packet Sweet N Low (Splenda is probably ok, but DO NOT use Equal)
3-4 cups apples, peeled and sectioned
1 6oz fat-reduced graham cracker crust
1 tub fat-free Cool whip
Directions:
Pre-heat oven to 375 deg. F.
In a medium saucepan over medium heat, combine pudding mix, juice, cinnamon, and sweetner. Stir well.
Add apples, stir constantly until boiling.
Pour in crust, shake gently to settle.
Bake for 20 minutes, let cool.
Top with Cool Whip and serve.
Enjoy.
This week's CotR is hosted by Drew of Conservative Friends (at least I think it is...)
In any case get those recipes in to recipe(dot)carnival(at)gmail(dot)com before 12am EDT Friday (Thursday night!)
April 14, 2005
It really exists!
Found TODAY for the first time ever in Chapel Hill:
(drumroll.....)
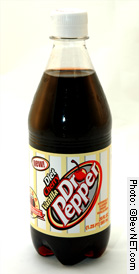
And it's actually pretty good. Tastes like cherry coke mixed with cream soda and a little Dr. Pepper. Go here for a more in-depth review
Don't worry, Darling Husband, there's one in the fridge for you. And I won't hold it against you either. I know you don't frequent the med school snack shop :)
April 16, 2005
Better late than never
Due to unforseen work circumstances, the Carnival of the Recipes is now up. Head on over to Countertop Chronicles for all of the yummy goodness this week!
April 20, 2005
Strawberries and Cream
It's strawberry season, which of course makes me homesick for those luscious CA strawberries that are WAY overpriced in our stores out here....
In honor of that, here's a recipe that turns out a beautiful 3-layer cake from scratch when done right.
Strawberries and Cream Cake (originally from allrecipes.com)
Ingredients:
2 3/4 cups cake flour
2 1/2 teaspoons baking powder
2 cups white sugar
1 (3 ounce) package strawberry flavored gelatin
1 cup butter, softened
4 eggs
1 cup milk
1 teaspoon vanilla extract
1/2 cup strawberries, pureed
1 1/2 cups heavy cream
2 tablespoons sugar
1/2 teaspoon vanilla extract
1 1/2 cups fresh strawberries, sliced
1/2 cup margarine, softened
1 (8 ounce) package cream cheese, softened
4 cups confectioners' sugar
2 teaspoons vanilla extract
1 1/2 cups quartered strawberries
Directions:
1. Preheat oven to 350 degrees F (175 degrees C). Grease and flour three 9 inch round cake pans.
2. In a large bowl, beat sugar, gelatin and butter until fluffy. Add eggs one at a time, beating well with each addition. Mix flour and baking powder, and beat alternately with the milk into the sugar mixture. Fold in 1 teaspoon vanilla and pureed strawberries. Divide equally into three 9 inch round cake pans.
3. Bake 25 minutes in the preheated oven, or until toothpick inserted into cake comes out clean. Cool for 10 minutes in the pans, then remove from pans and cool completely.
4. To make the filling: Beat whipping cream, 2 tablespoons sugar and 1/2 teaspoon vanilla on high until stiff. Fill each layer with 1/3 of the whipped cream and 3/4 cup sliced strawberries.
5. To make the frosting: Beat the margarine, cream cheese, confectioners' sugar, and vanilla until creamy. Spread over the sides of the cake, and pipe an edge of frosting around the top of the cake.
6. Spread remaining whipped cream on cake top. Top with quartered strawberries.
Submit your own recipes to the Carnival of the Recipes by emailing your link (if you have a web presence) or your recipe (if you don't) to recipe(dot)carnival(at)gmail(dot)com
This week's CotR is hosted by Bev at bebere.com. Next week the CotR stops here! And of course thanks to SWWBO for starting the whole thing....
April 23, 2005
Yummy for my Tummy
The Carnival of the Recipes is up at bebere.com, complete with poetry.
Bev did a great job! Drop by and check it out!
Next week the CotR moves here, don't miss it!
April 29, 2005
Carnival of the Recipes XXXVII
The Thesis-In-Progress Edition
(forgive me, folks, I've got thesis on the brain. My defense meeting is May 26th!)
Abstract (Drinks):
The Carnival of the Recipes is a weekly roundup of the best recipes of the blogosphere. Individual bloggers submit recipes of their choice for all comers to enjoy. The posts are collected by a single host, and the links are provided by the host on each Friday, unless life intervenes. The Carnival has become more popular as time has gone on, and in addition to the usual main dishes and desserts, bloggers often submit unusual recipes or advice on cooking, as in B.Durbin of Booklore's Coconut-Hazelnut Smoothie and Recipe Challenge.
Chapter 1 Starting a Carnival (Soups, Salads, and Sauces):
The Carnival of the Recipes was started by Beth Donovan as a way for all of the blogosphere cooks to exchange their favorite recipes and get ideas. Soups, Salads, and Sauces are all an important part of a meal: adding to the main dish, cleansing the palate, bookending a fabulous meal. Recipes that you can use to start a meal this week include:
Jeff's Substitute A1 sauce from Ponytailed Conservative
The Queen's Spaghetti Sauce (or Dean's Favorite Pot Roast) from the Queen of all Evil
Split Pea Soup from Tanker at Mostly Cajun
Bean soup with Hambone from Bo the Nook of A Geezer's Corner
Tortilla Soup from Owlish of Owlish Mutterings
Bachelor Salad from Boxing Alcibiades
Chapter 2 Tempting the Palate (Appetizers and Sides):
Side dishes and appetizers are crucial to a successful meal. Guests come together over appetizers, and get a chance to socialize before the heavy food in the main course. Side Dishes give the main course a special extra zip. You might want to try out the effect of some of these:
Sausage and Cheese Snacks from Prochien Amy
Something-Or-Other Rice from David of Third World County
Jalapeño and Cheese Latkes from David G at Daily Pundit
Chapter 3 The Main Event (Main Dishes):
The main dish is the centerpiece of every meal, and consistently is the main focus of the Carnival of the Recipes. Main dish recipes are shared from house to house, from generation to generation. These recipes are shared in the same spirit:
Portobello and Bow Tie Pasta from Oddybobo
Gehockteh Leber from Ellison of Blog D'Ellison
Stuffed Zucchini from VW of One Happy Dog Speaks
Beef Tamales from the Redneck Gormet
Stuffed Salmon from Kevin at Technogypsy
Pizza (everything from tips to a dough recipe) from the AnarchAngel
Crawfish Etoufee (easy and hard methods) from Shawn of Everything and Nothing
Fava Beans with Sausage from Bo the Nook of A Geezer's Corner
Pepper Vodka Chicken from FrazzledDad
Italian Omelets from Ted at Rocket Jones
Landlocked Mussels from Punctilious at Blog O'Ram
Grillade Penne with Tomato Gravy from Christina of Feisty Repartee
Chapter 4 Finishing Touches (Desserts and Sweets):
Dessert isn't just the last course, it's often the best course. So in this case we're saving the best for last. And I guess we'll make this short and sweet:
Sweet Haggis (no intestines, no liver) from Donna at PajamaPundits
Fudge Cake with Whipped Amaretto Icing from Christina of Feisty Repartee
Orange Refrigerator Cookies from Be of Bebere.com
Fruit Pizza from Tinker at The Secret Life of Shoes
Key Lime Cream Cheese Pie from Songstress7 at News From the Great Beyond
Mud Cookies from Sissy of And What Next
Crackling Cookies from triticale
Doctor Bird Cake from Dave of The Glittering Eye
Conor's Birthday Cheesecake from Mary Beth of Random Thoughts
Chapter 5 Future Directions:
Next week's Carnival of the Recipes is hosted by Kevin at Technogypsy
Appendices (late arrivals):
Dinner in a Bowl from Sisu Sissy
Avgolemono Soup from Countertop of Countertop Chronicles
Hopefully all the trackbacks went through... If you didn't get one email me. The pinger is acting up...
May 11, 2005
Eat What You Want Day!
I wish....
According to this, today is Eat What You Want Day!
Yay! You can celebrate one of two ways:
1. Buy Steve-O's book
or (substantially cheaper a.k.a. free)...
2. Share what you would eat if you could eat everything you wanted.
Here's my list:
Tommy's Chili Double Cheeseburger and chili cheese fries
Double Double Animal Style, and a Strawberry shake
Waffle Cone double scoop Peppermint over Cookies-N-Cream from Fosselman's
Trader Joe's Taquitos
Aunt Mary's Boereg (Armenian cheese turnovers)
Beef Stroganoff (my grandmother's)
Amante's Shepherds Pie Pizza with Pepperoni
Fried Dill Pickles
Big Stick Popsicles (the red, orange, and yellow ones, you can't get them here)
Homemade tamales
Salami and ritz crackers
Caramel Apples
Garlic Bread
A&W Root Beer Float
There's more, I just felt sick looking at that much food. BTW, anyone notice a theme here?
(h/t Michele)
Tomato Mozzarella Salad
It's getting to be summer, and aside from my baby blueberry bush, the one thing I must have in the garden is basil. Our favorite thing to do with fresh basil is make a quick salad of tomatoes, Mozzarella cheese, and Basil.
It's pretty simple, not even a formal recipe and you can scale it up or down to feed as many or as few people as you like.
1. Equal parts tomatoes and mozzarella cheese.
- We like chopped roma tomatoes or whole cherry or grape tomatoes
- I usually use fresh mozzarella balls in brine (from costco!), chop to approx. the size of the tomato pieces. Cubed manchego or gouda is also a good treat if you're in the mood for a different cheese.
2. Several sprigs of fresh basil, chopped
-again, to your taste. We like a lot of basil
3. Extra Virgin Olive Oil, 1.5 Tbsp/cup of tomatoes or so
-get a lightly flavored oil so it doesn't overpower the fresh ingredients
4. Balsamic Vinegar, 2 Tbsp/cup of tomatoes
-we use a Pomegranate flavored BV, but a good strong standard balsamic or another fruit flavor works well, too.
That's it.
Chop tomatoes and cheese to bite size pieces if necessary. Chop up basil leaves, removing stem pieces since they're not as nice to eat. Toss with oil and BV. Refrigerate before serving if desired or serve immediately.
If I have some on hand, I like to toss in a few small crostini just before serving for some crunch.
This is on the menu nearly every day in the summer, especially if the deer have avoided the tomato plants, and I have to fight my husband to even get any :)
May 13, 2005
It's up!
The lovely and talented Boudicca of Boudicca's Voice is the host of this week's Carnival of the Recipes. Lots of yummy things this week, and especially a number of really yummy looking recipes that won't break that swimsuit diet!
Drop by and check it out!
May 18, 2005
In honor of Star Wars Ep III
Alright, I suppose they should have been "sepratists" or "jedi" or "clones" but most normal people don't include those words in their recipe titles, so we're going OT.
Two recipes this week:
First, from Emporer Palpatine:
Imperial Pork Salad
Makes 4 servings.
1/4 cup vegetable oil, divided
1/2 pound lean pork, cut in
bite-size pieces
1 large clove garlic, minced
1/4 cup California raisins
1/4 cup red wine vinegar
1 tablespoon soy sauce
2 teaspoons sugar
1 teaspoon cornstarch
1 teaspoon ground ginger
3 fresh ripe plums, divided
4 cups shredded lettuce
1/4 cup chopped cilantro or parsley
Sliced green onion; for garnish
Directions:
Heat 1 tablespoon oil in skillet. Add pork and garlic.
Saute over high heat 1 minute or until pork is no longer pink. Add raisins and stir in remaining oil, vinegar, soy sauce, sugar, cornstarch and ginger. Bring to boil. Remove from heat. Cube 1 plum and combine with lettuce and cilantro in shallow serving bowl. Spoon pork mixture on top.
Quarter remaining plums and arrange along side. Sprinkle onion slices overall.
And from the Alliance:
Rebel Angels
Makes 4 servings.
1 pound bacon
2 tablespoons onion powder
2 tablespoons dried oregano
2 tablespoons dried basil
1 tablespoon dried thyme
1 tablespoon ground black pepper
1 tablespoon ground white pepper
1 tablespoon ground cayenne pepper
5 tablespoons paprika
1 pound large shrimp - peeled
and deveined
Directions:
1 Cut bacon strips into thirds. In a large saucepan fry
bacon 5 minutes, they should remain somewhat limp (bacon is
not yet fully cooked).
2 Combine onion powder, garlic powder, oregano, basil,
thyme, black pepper, white pepper, cayenne pepper, and
paprika in a medium sized bowl. (To regulate the spiciness of
this dish use the white pepper and cayenne pepper to
taste). Coat shrimp with the spices.
3 Wrap bacon around shrimp, secure with toothpicks.
4 Fry shrimp in saucepan over medium heat until bacon is
crisp and shrimp are pink. Serve hot.
May 20, 2005
Carnival Time!
This week's Carnival of the Recipes is up at the home of fellow MuNuvian Jordana of Curmudgeonry. Lots of great recipes from all across the spectrum this week, and some I definitely want to try!
Go here for all the yummy-ness!
June 15, 2005
Mom's Pea Salad
Mom's sitting here next to me, so I don't have to call her to post the recipe.
I personally hate peas, but everyone who likes peas can't get enough of this salad, and I'll pick through the peas to get to the other stuff.
Don't give me any crap. I'll eat most other veggies. Just not Peas.
CaltechMom's Summer Pea Salad
1 package petite frozen peas
1 large package cheese tortellini
3 stalks celery, chopped
1-1.5 cup cubed jack cheese
1/2 sweet or red onion, sliced
1/2 cup cashews
6 slices bacon, cooked and crumbled
Ranch Dressing
1. Thaw and drain peas.
2. Cook cheese tortellini according to package directions, drain and cool.
3. Combine peas, tortellini, celery, onion, and cheese in a large salad bowl
4. Add ranch dressing to your taste, toss to mix
5. Chill until ready to serve
6. Top with cashews and crumbled bacon before serving
June 18, 2005
It's Carnival time!
This week's Carnival of the Recipes is up!
Thanks to the lovely Michele of Meanderings for hosting! Everything looks soooo yummy!
June 24, 2005
Looks Yummy!
This week's Carnival of the Recipes is up, hosted by Dana of Note-It Posts.
Everything looks so wonderful. Go check it out!
July 14, 2005
Chill Out!!
It's going to be 106 (that's Fahrenheit, folks) today in Fresno, so I thought I'd post a great cool-down recipe. I love Pina Coladas, and this is a great Pina Colada punch recipe for those summertime get-togethers, backyard barbecues, etc. It can be scaled down to make just a pitcher or you can make the whole enchilada for a big group.
Pina Colada Punch
Prep Time: approx. 20 Minutes. Makes 30 servings. Originally from allrecipes.com
1/2 gallon vanilla ice cream, softened
1 (20 ounce) can crushed pineapple (or chopped fresh if you've got it)
1 (8 ounce) can coconut cream
1 (46 fluid ounce) can pineapple juice
2 cups light rum (can be omitted, just add more juice/soda to make volume)
1 (2 liter) bottle lemon-lime flavored carbonated beverage
Directions
1 In a large plastic container, combine ice cream, crushed pineapple, coconut cream, pineapple juice and rum. Mix well and slowly stir in the lemon-lime soda. Freeze for 4 hours or until slushy. If you don't have a lot of time, mix all ingredients and blend until slushy in small batches in the blender. Freeze until serving.
August 25, 2005
August 26, 2005
Carnival of the Recipes #54
Welcome to this year's Back-to-School Carnival of the Recipes! A great menu of recipes for kids of all ages!**
** this in no way implies that kids of any particular age will enjoy any particular recipe...
Preschool (Breakfast):
Easy Pain Perdu French Toast from Rob at Easy Eats
Elementary School (sides and sauces):
Kindergarten: Happy Cilantro Sour Cream from Jami Leigh
1st Grade: Yummy Homemade Balsamic Vinaigrette from Heather at Angelweave
2nd Grade: The Best Homemade Fat-Free Caesar Dressing from Shawn of Everything and Nothing
3rd Grade: Spice Mixes from Dave at The Glittering Eye
4th Grade: Salsa the first of two recipes from David of third world county
5th Grade: Fresh Peach Salsa from Marsha of A Weight Lifted
6th Grade: Freezer Coleslaw from Michele of Meanderings
Middle School (Can be either a side or an entree):
7th Grade: Fried Tofu with Spicy Sauce from Romeocat at CatHouse Chat
8th Grade: Hummus from Army Wife, Toddler Mom
High School (Entrees):
9th Grade, Spicy Foods 101:
First up, a holdover from last week, a second recipe from Shawn of Everything and Nothing, Jambalaya Grits
Next, Chicken in Peanut Curry Sauce from Aussie Wife Amanda
Also, Mapo Tofu Done Right from Kevin at Technogypsy
10th grade: Eggs and Cheese
First, Spicy Egg Sandwich from VA Republic Man at Flaming Duck
Next, Quiche from Taleena at Sun Comprehending Glass
Cheese Stuffed Chicken Rolls (for the Microwave, an easy 'A' recipe!) from Owlish of Owlish Mutterings
and finally, for all you cheeseheads who hate that Lasagna involves tomato sauce (duh, it spoils the cheese) Mike of Meeting Ozarkland presents his recipe for White Lasagna
11th Grade: Tomatoes and more Tomatoes
Just two dishes, what a slacker year.....
First, Stuffed Tomatoes from Kevin of Seriously Good, just like Mom used to make!
Next, Miss O'Hara presents Spaghetti Squash with Romas, Sundried Tomato Pesto, and Pine Nuts.
Senior Year: Fish and and Not Fish
First up, Pecan-Crusted Snapper from Allan of Allan Thinks
Next, Perche de Cresson (Perch with Watercress), the first of two submissions from Mensa Barbie
Finally, Couscous meal, a yummy combo of couscous and meat from B Durbin at Booklore.
Did you graduate?? You did? Good. You can have dessert, assuming you get that far.....
But first College, and what would college be without booze? Here are three great recipes GUARANTEED to put you in that festive party mood:
Hurricanes (how time-appropriate!) from Daisy Mae at Dubious Wonder
Making The Perfect Martini from triticale
and last but not least, Death By Chocolate from Two Dogs of Mean Ol' Meany. Definitely one of MY favorites from college!
And finally, Graduate School: Dessert.
Hey, I just finished Grad School, and let me tell you, this is the only way it will EVER be sweet.....
First up, Lemon Cheese Bars from Donna B of Pajama Pundits. So bad yet sooo good.
Next, Easy Maple Cake from Cafe Oregano
For those of you with lots of fruit coming in, Punctilious of Blog O'Ram has a plan to make small batches of preserves. Yum!
The second recipe from third world county: Ice Cream Sandwiches made with Javascript cookies. Appropriately enough, just scroll down....
Aeryk of Geek Can Cook brings you the Perfect Creme Brulee.
From Tinker at The Secret Life of Shoes comes (what else??) Shoe Fly Pie
A second recipe from Mensa Barbie, Raspberry Pomme, which looks to be a yummy fruit tart flavored with Grand Marnier
Cookies from Jay Solo of Accidental Verbosity: Cereal Flake Cakes
From Physics Geek, Pumpkin Pie with Cheese Crust
and finally, not the icing on the cake, but certainly the sauce on the ice cream, Best Ever Hot Fudge from Elisson at Blog d'Elisson
LATE FOR SCHOOL: Laurence Simon has a list of all of his recipes posted here.
That's the lot. You all get your honorary PhD in Yumminess! Thanks to all the authors for submitting recipes and of course, to Beth for keeping the Carnival of the Recipes going!
If you're new to my little corner of the blogosphere, stick around, read a bit, and if you like what you see, drop in again!
UPDATE: Haloscan is giving me hell for too many trackbacks, so if you didn't get one, please hang on, and I'll get to them tomorrow when it will let me try again...
September 01, 2005
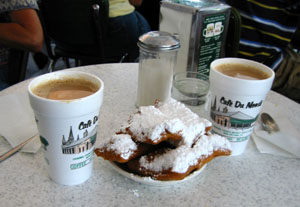
A little bit of Nawlins for you
I have been thinking of my trip to New Orleans. It was for a conference, but I also spent my birthday there during the trip, and I can't help but think of the afternoon of my birthday, and the 45 minutes my friend Heather and I spent at the Cafe du Monde, eating beignets and drinking Iced coffee, talking and laughing and having a wonderful time. It was one of the best times I've ever had on my birthday.
In honor of that day, straight from the Cafe du Monde, Beignets:
 1/4 cup lukewarm water
1 package active dry yeast
1/4 cup granulated sugar
2 tablespoons vegetable shortening (shortening, not oil)
1/2 teaspoon salt
1/2 cup boiling water
1/2 cup heavy cream
1 egg, beaten
4 to 4 1/2 cups unsifted all-purpose flour
vegetable oil for deep frying (at CdM they use Louisiana Cottonseed Oil)
confectioners' (10X, powdered) sugar (lots and lots and lots!!!!)
Pour the lukewarm water in a shallow bowl and sprinkle the yeast over it. Allow the yeast to rest for 3 minutes, then mix well. Set in a warm, draft-free location (ie: an unlighted oven) for 10 minutes or until the yeast bubbles up and the mixture has almost doubled in bulk.
Meanwhile, combine the granulated sugar, shortening and salt in a deep mixing bowl. Add the boiling water and stir with a wooden spoon until thoroughly mixed and the beignet mixture has cooled to lukewarm. Add the heavy cream, the yeast mixture and the egg. Add 2 cups of flour, and when it's completely incorporated, beat in up to 2 1/2 cupsmore flour, 1/4 cup at a time. Add only enough flour to make the beignets dough smooth and not sticky. When the beignets dough becomes too stiff to stir with the spoon, work in the flour with your fingers.
Pour vegetable oil into a deep fryer to a depth of 2 or 3 inches and heat the oil until it reaches a temperature of 360 degrees f. If your deep fryer doesn't have a thermostat, check the temperature with a deep-frying thermometer.
Gather the beignets dough into a ball, put it on a lightly-floured surface and pat into a rectangle about 1" thick. Dust a little flour on both sides of the beignets dough and roll it out, lifting and turning after each pass, until the rectangle is about 1/4" thick and about 25" long by 10" wide. If your beignets dough sticks to the surface, lift it with a metal spatula and sprinkle more flour under it.
With a sharp knife, cut the dough into 10 square beignets and deep fry, 2 at a time, immediately by dropping them into the hot oil and turning them over with a slotted spoon the moment they rise to the surface. Continue frying, turning the beignets often. until the beignets are crisp and golden on all sides, about 3 to 5 minutes. When they are done, transfer the beignets to brown paper or paper towels to drain. Immediately sprinkle with the confectioners' sugar and serve while still warm. Use the picture (above) as a guide for how much confectioner's sugar to use!
September 08, 2005
easiest ever stuffed peppers
So DH asked for stuffed peppers the other night. Which was weird. I personally believe less is more when it comes to bell peppers, but hey, whatever, it was his first day at work.
So I went looking around the internet and here's what I came up with:
INGREDIENTS:
2 cups water
1 cup uncooked white rice
3 large green bell peppers, halved and seeded
1 - 1 1/2 pounds lean ground beef
1 onion, diced
garlic powder to taste
salt to taste
ground black pepper to taste
1 jar your favorite spaghetti/marinara sauce (~27 oz)
2 cups finely shredded mozzarella cheese
________________________________________
DIRECTIONS:
1. In a medium saucepan, bring water to a boil. Add rice and stir. Reduce heat, cover and simmer for 20 minutes.
2. Preheat oven to 350 degrees F (175 degrees C).
3. Place green bell peppers in a medium saucepan with enough water to cover. Bring to a boil and cook for 10 minutes. Remove peppers from the water and set aside in a 9x13 inch baking dish.
4. In a large saucepan over medium heat, brown the ground beef; drain. Return to heat and mix in onion, cooked rice, garlic powder, salt and pepper. Pour in tomato sauce and mix thoroughly. Let simmer for about 10 minutes. Remove from heat.
5. Spoon the meat mixture onto each half of the green peppers. Bake in the preheated oven for 40-45 minutes or until mixture begins to turn golden brown.
6. Sprinkle mozzarella cheese over the top of each stuffed pepper. Return to the oven and bake until cheese is lightly browned, about 5 to 10 minutes.
There will be PLENTY of the meat mixture unless you chose the world's largest peppers to stuff, so feel free to fill them up to the brim :)
September 30, 2005
Chicken Apple Curry
This is a simple, yummy curry that you can make with just ingredients that most of us keep in the kitchen. A flavorful, healthful change of pace. As written, it's mild enough that most kids will eat it. Of course you can use margarine, lo-fat or skim milk, and lo-fat, lo-salt chicken broth to make this better for you! This recipe increases and decreases easily. More variations found below the directions. Originally found here.
3 tablespoons butter
2 small onion, chopped
2 apples - peeled, cored and
finely chopped
3 tablespoons all-purpose flour
1 tablespoon curry powder
8 skinless, boneless chicken breasts
1 cup hot chicken broth
1 cup milk
salt and pepper to taste
Directions
1 Preheat oven to 350 degrees F (175 degrees C).
2 Saute apple and onion in butter or margarine until
tender. Add curry powder and saute 1 minute more. Add flour
and continue to cook 1 minute longer. Add stock or broth
and milk; stir well.
3 Salt and pepper chicken breasts to taste and lay in a
single layer in a 9x13 inch (or larger) baking dish. Pour
sauce mixture over chicken breasts and bake in preheated
oven for 45 to 50 minutes, until chicken is done.
Serves 4-8 depending on the size of the chicken pieces and who you're feeding. Serve over basmati rice or bulgur (my favorite) or with naan bread (yum!)
Other variations: Use half and half, coconut milk, or yogurt instead of milk, depending on your taste and what's in your pantry. Also, if you're a heavy curry fan, you'll probably want to add more and/or some garam masala to your taste. Also good over turkey breast or pork tenderloin.
October 07, 2005
It's Divine
As a non-chocoholic, I love nougatty and vanilla-y candies, and one of my all time favorites is Divinity. Usually you make it for Christmas or in the winter, but you can make it any time of year (although it doesn't come out as well on rainy or humid days) and someone always makes it for my parents' church Bazaar, and as Bazaar time is coming around again soon, I thought I'd share a recipe for this yummy treat.
This particular recipe comes from Paula Deen and makes a harder candy, but they're all about the same.
Mama's Divinity
4 cups sugar
1 cup white corn syrup
3/4 cup cold water
3 egg whites
1 teaspoon pure vanilla
2 cups chopped pecans or walnuts
In a heavy saucepan over medium heat, stir together the sugar, corn syrup, and water. Stir only until sugar has dissolved. Do not stir after this point. Cook syrup mixture until it reaches 250 degrees F on a candy thermometer, bringing it to a hard ball stage.
While the syrup is cooking, beat the egg whites until stiff peaks form. Once the sugar mixture reaches 250 degrees F, carefully pour a slow steady stream of syrup into the stiffly beaten egg whites, beating constantly at high speed. Add the vanilla and continue to beat until mixture holds its shape, approximately 5 minutes. Stir in pecans or walnuts.
Using 2 spoons, drop the divinity onto waxed paper, using 1 spoon to push the candy off the other. This may take a little practice because the technique is to twirl the pushing spoon, making the candy look like the top of a soft serve ice cream. If the candy becomes too stiff, add a few drops of hot water. You will need to work fast when making this type of candy. After you spoon the cooked sugar and nuts onto the waxed paper, you're done. Cool the candies on racks completely. You can store them in an airtight container for up to 2 weeks.
Alternatively, you can pour this into a foil lined pan that has been Pam sprayed then cut into squares if you are not comfortable spooning it out. This is the way I like it. You can also add food coloring to the mix if you want to make it pretty.
October 14, 2005
An oldie but a goodie
This was my very first submission to the Carnival of the Recipes, and in honor of this week's all-pork-all-the-time theme, I thought it was worth rerunning, as it is my ALL-TIME FAVORITE piggy recipe:
"Blasphemous" NC Barbecue (a.k.a. Crock-Pot Piggy)
Time: 8 hours + overnight, largely unattended
Rub:
4 tablespoons paprika
4 tablespoons brown sugar
2 tablespoons kosher salt
2 tablespoons cracked black pepper
2 tablespoons ground cumin
2 tablespoons chili powder
2 tablespoons dry mustard
2 tablespoons ground coriander (or any coriander-containing premade rub that doesn't have a lot of salt)
1 tablespoon cayenne pepper
½ tablespoon Cinnamon
½ tablespoon Pumpkin Pie Spice
1 teaspoon allspice
1 tablespoon cayenne pepper
(makes close to enough for 2 roasts, store in a Ziploc sandwich baggie)
1 pork butt roast, 5 to 6 pounds
1 ½ cups apple cider (unfiltered)
1 small lemon, juiced ( ½ -3/4 cup of juice)
Barbecue sauce (sometimes called Dip):
1 cup white vinegar
1 cup cider vinegar
1 tablespoon sugar
1 tablespoon crushed red pepper flakes (may substitute cayenne, but as written is damn near close to Bullock’s sauce)
1 tablespoon Tabasco sauce
Salt and freshly cracked black pepper to taste.
Whisk ingredients together in a bowl. Drizzle into meat.
Covered, leftover sauce will keep about 2 months.
Yield: About 2 cups.
Directions:
1. Mix dry ingredients together in bowl, using a fork to break down hunks of brown sugar. Put Boston butt roast in crock pot, apply spice rub to pork butt with your hands, covering meat entirely one side at a time, turning roast until entirely coated, wiping any spilled rub up from the bottom of the pot and using it to coat subsequent sides of the roast. Roast should end up fat side UP.
2. Add Cider and Lemon Juice to crock pot, being careful not to wash spice rub off of the top of the roast.
3. Cover with lid and cook on high 4 hours. Turn meat. Cook 4 more hours. Turn meat again (if possible) and turn power to low. Leave crockpot on over night.
4. Let cook on low 10-12 hours (including overnight) (meat is done by this time, but the longer it sits, the more fat is melted (improves texture)). Turn off crock pot, and let meat sit, covered, about 45 minutes because otherwise it is TOO HOT to handle.
5. Pour meat and liquid into a LARGE bowl with a colander to separate meat from juice. Be sure to remove the bone(s) at this time.
6. Dump meat and fat bits from colander into another LARGE bowl. “Pull” the meat (shred between 2 large forks) until in bite size shreds.
7. Make up barbecue sauce. Mix in with meat, serve or let stand in refrigerator. Tastes even better later !
Yield: 10 to 12 servings, if you’re lucky.
Originally posted here.
October 21, 2005
Hallowe'en Pumpkin Cake
Hallowe'en is just a week from next Monday, so it's high time to be thinking about all of those yummy treats.
One of my favorite fall recipes is Pumpkin cake, and this recipe makes a bundt cake, perfect for turning into a Pumpkin!
Pumpkin Cake
1 cup vegetable oil
3 eggs
1 (15 ounce) can pumpkin puree
1 teaspoon vanilla extract
2 1/2 cups white sugar
2 1/2 cups all-purpose flour
1 teaspoon baking soda
1 teaspoon ground nutmeg
1 teaspoon ground allspice
1 teaspoon ground cinnamon
1 teaspoon ground cloves
1/4 teaspoon salt
1/2 cup chopped walnuts
Directions
1 Preheat oven to 350 degrees F (175 degrees C). Grease
one 10 inch bundt or tube pan.
2 Cream oil, beaten eggs, pumpkin and vanilla together.
3 Sift the flour, sugar, baking soda, ground nutmeg,
ground allspice, ground cinnamon, ground cloves and salt
together. Add the flour mixture to the pumpkin mixture and mix
until just combined. If desired, stir in some chopped nuts.
Pour batter into the prepared pan.
4 Bake at 350 degrees F (175 degrees C) for 1 hour or
until a toothpick inserted in the middle comes out clean.
Let cake cool in pan for 5 minutes then turn out onto a
plate and sprinkle with confectioners' sugar.
To make this cake a "real" pumpkin, skip the confectioners sugar and instead frost with an orange-colored frosting. Shape a stem out of green tinted marzipan or frost a small cupcake green. Or you can shape a stem from twisted green construction paper, just make sure no one eats it! To make the plain pumpkin cake into a jack-o-lantern, use triangle-shaped candies for the eyes, nose, and mouth; attach them to the cake with a little extra frosting. To make an extra large pumpkin cake, bake two Bundt cakes and attach the flat sides together, then frost to resemble a pumpkin!
October 28, 2005
We're Watching You!
Two tasty eyeball recipes for this weekend's Hallowe'en parties: one sweet, one savory.
Eerie Eyeballs
Yields approximately 9 dozen bite-sized eyeballs
3 oz lemon gelatin (can be sugar-free)
1 cup hot water
1/2 cup miniature marshmallows
1 cup pineapple juice
8 oz cream cheese (can be lowfat/Neufchatel)
1 cup mayonnaise (can be fat-free)
Dissolve lemon gelatin in 1 cup water in double boiler, add marshmallows and stir to melt. Remove from heat. Add pineapple juice and cream cheese. Beat until well blended. Cool slightly. Fold in mayo. If you have a truffle candy mold or round ice cube trays, pour the mixture in the molds and leave to set in the fridge. Otherwise pour into a deep ceramic dish and chill until thickened or firm enough for scooping into eyeballs. Using a melonballer, scoop full balls of the mixture and set aside for decoration. To decorate, use liquid food coloring and an old detail paintbrush and get creative. You will need black food coloring for the pupils. Also, if you are in a hurry, instead of painting the colored irises, you can carefully dip the ball in a small pool of food coloring to approximate the iris, but still paint on the pupils. Alternatively, you can use a drop of melted chocolate or black gel frosting for the pupils.
Devil's Eyes
Yields two eyes for each egg you boil.
hardboiled eggs
mustard (can be dijon or other flavored mustards if you like)
mayonnaise
green food coloring
sliced black olives
paprika
To hardboil the eggs, put the eggs in a large saucepan, and fill with water until the eggs are fully covered. Put the full pan on the stove and bring to a boil over meduim heat. As soon as it reaches a rolling boil, remove from heat, still covered, and let stand covered for 20 minutes. As soon as the 20 minutes is up, run cool water over the eggs so they stop cooking. Once cool, refrigerate until ready to use.
Peel the hardboiled eggs and slice in half lengthwise. Gently pop out the yolks into a separate bowl. Once all the yolks are in the same bowl, add some mustard and a little mayonnaise to taste just so the mixture sticks together when mixed. Add food coloring 1-2 drops at a time, mixing in until you've reached the color you want. Blend with a fork, then scoop the yolk mixture back in the hollows of the egg halves. Sprinkle each half with paprika (gives a bloody appearance) and lay one olive slice in the middle or each half as a pupil. Refrigerate until ready to serve.
Happy Hallowe'en!
November 04, 2005
Birthday Cake
Next Thursday is my birthday, so I'm going to post the recipe for my very favorite birthday cake. I love Red Velvet Cake, especially with Cream Cheese Frosting, but for some reason it's just not chocolatey to me. Which is good, as I am merely a chocolate "tolerator"...
This particular recipe is super moist and rich and fattening and perfect for a birthday party. I love it! Also the frosting recipe is super light, made with cream cheese and whipped cream.
Red Velvet Cake
1 cup butter, softened
3 cups white sugar
6 eggs
1 ounce red food coloring (minimum)
3 tablespoons unsweetened cocoa powder
3 cups all-purpose flour
1 cup buttermilk
1 teaspoon vanilla extract
1/2 teaspoon salt
1 teaspoon baking soda
1 tablespoon white vinegar
Directions
1 Preheat oven to 325 degrees F (165 degrees C). Grease and flour three round 8 or 9 inch cake pans.
2 In a large bowl, cream 1 cup butter with sugar. Add eggs one at a time, beating well after each addition. Add food coloring to mixture.
3 Mix cocoa with flour and add mixture to large bowl alternately with buttermilk, add vanilla and salt.
4 Mix baking soda with vinegar, and gently stir into mixture. Be careful not to over mix.
5 Divide batter into three prepared 8 or 9 inch round pans. Bake at 325 degrees F (165 degrees C) for 25 minutes. Check for doneness with a clean toothpick inserted in the center of each cake and allow to cool. If you use a different type of pan, timing may be much longer.
Cream Cheese Frosting
1 (8 ounce) package cream cheese (room temperature is best)
1 cup confectioner's (powdered) sugar
1/8 teaspoon salt
1 teaspoon vanilla extract (make it a heavy teaspoon)
1 1/2 cups heavy whipping cream
Directions
1 In a small bowl beat whipping cream until stiff peaks form; set aside.
2 In a large bowl combine cream cheese, sugar, salt and vanilla. Beat until smooth, then fold in whipped cream.
November 07, 2005
It's souper!
How could I forget? This week's Soup themed CotR is available at PajamaPundits for your happy perusal!
November 14, 2005
Carnivals!
Ah, something logical I can post here. Yay!
The latest Carnival of the Recipes is up at Myopic Zeal.
In other carnivals, there is also Carnival of the Capitalists, with a nifty collegiate theme at The Entrepreneurial Mind, the first ever Carnival of Marketing at Okdork.com, and Carnival of Computing at Business & Technology Reinvention.
November 15, 2005
No Blood For Condiments
Condiments are always popular blogging, and Dean has taken it to a whole new level by proposing death to the infidels who would sully hot dogs with ketchup. Much more fun that talking about some other topics we won't mention here.
What Dean doesn't know about is Amendment one and three quarters, visible between the First and Second to those of us who are not condimuggles. It declares freedom of condiment choice and application for all, and applies even to those who would do something as grotesque as putting mustard on a burrito. Just take the word of the condiment wizards among you, who say "no blood for ketchup." Or even for using icky brown mustard. Or even for comparing yummy ketchup to yummy but in no way similar maple syrup. Heck, even for failure to use Heinz ketchup.
(Thank you, thank you... I'll be here all week.)
November 18, 2005
Slap Your Momma
I know the lovely Caltechgirl posts recipes and something tells me she is a chocolate lover.
This is quite simply the best chocolate cake known to man.
Enjoy!
Slap Your Momma Chocolate Cake
1 box Devil's Food Cake Mix
1/4 cup unsweetened cocoa
1 cup mayonnaise
1 cup water
3 large eggs
2 - 16 oz containers chocolate frosting
1/4 cup sour cream
2 tsp Amaretto
1 cup sweetened and flaked coconut
1/2 cup toasted, chopped almonds
For the cake combine the mix, cocoa, mayonnaise, eggs, and water in a large bowl. Beat for two minutes, first on low, then on high. Pour into greased and floured 8 or 9-inch round pans. Bake at 350 degrees for 35 minutes, until done.
For the frosting: In a medium bowl, combine frosting, sour cream, and Amaretto.
Transfer approximately 1 1/2 cups of the frosting to another bowl and stir in almonds and coconut. This is the filling.
Once the cakes have cooled from the oven, use the filling between the layers, then frost with the remaining frosting. If you are feeling particularly adventurous, split each layer in half and use filling in between for a torte-like cake.
After serving, store remainder in the refrigerator.
This one is slap yo' momma good.
December 17, 2005
Holiday Carnival Time!
Welcome to the 70th edition of the Carnival of the Recipes. Lots of wonderful holiday recipes for us all to share!
First up, a serving of history and some delicious hot beverages:
Wassail history and recipes from George Stratton of In the Interest of Me
Yummy treats for a Holiday Brunch or Christmas Morning:
Orange Slices in Wine and Lime from Punctilious of Blog O'Ram
Easy Monkey Bread from Deputy Headmistress of The Common Room
Cinnamon Apple Pockets from ALa of Blonde Sagacity
Warm and delicious soups and stews, perfect for cold winter nights:
Southwest Chowder from Joan of Oasis of Sanity
Hot and Sour Soup from Kevin of Technogypsy
Unexpected Beef Stew from Judith of Kesher Talk
Sides and Main Dishes for all those Holiday Feasts:
Baked Garlic Jalapeno Cheese Grits from Trouble in Shangri La of Dubious Wonder
Holiday Green Beans from Marsha of A Weight Lifted
Crater Gravy from triticale
Pepper Steak from Peaches of The Peach Pit
Holiday Sweets and Treats:
Swedish Butter Crescent Cookies from Aeryk of Geek Can Cook
Greek Wedding Cookies from Taleena of Sun Comprehending Glass
Afghan Biscuits, a family tradition from Keewee of Keewee's Corner
Pnina Shichor's Sufganiyot from Amanda of CustomerServant
Chocolate Mice from Shawn of Everything and Nothing
And my personal favorite, a perfect fit for Christmas parties, my own Birthday Red Velvet Cake
Ith has a wonderful collection of all sorts of holiday recipes. Just click over and keep scrolling down!
And finally for some holiday laughs try one of these:
Jose Cuervo Christmas Cookies from Elisson of Blog d'Ellison or
Rita's Christmas cake from Riannan of In the Headlights, and be sure to scroll down for the "real" recipe.
That's the lot. Merry Christmas, Happy Hanukkah, Blessed Solstice, and Happy Holidays to each and every one of you!
February 03, 2006
Irish Cream Chocolate Cheesecake
It's been a looooooong time since I posted a recipe, so it's about time, and in honor of this weekend's Chocolate-Fest at Amy's, I give you a tried and true personal favorite:
Irish Cream Chocolate Cheesecake
Prep Time: 20 Minutes Cook Time: 1 Hour 20 Minutes Ready In: 9 Hours 20 Minutes
Yields: 12 servings
INGREDIENTS:
1 1/2 cups chocolate cookie crumbs (Crushed Oreo or similar)
1/3 cup confectioners' (powdered) sugar
1/3 cup unsweetened cocoa powder
1/4 cup butter, to be melted
3 (8 ounce) packages cream cheese, softened
1 1/4 cups white sugar
1/4 cup unsweetened cocoa powder (yes, same as above, you need it twice)
3 tablespoons all-purpose flour
3 eggs
1/2 cup sour cream
1/4 cup Irish cream liqueur (love that Bailey's)
DIRECTIONS:
1. Preheat oven to 350 degrees F (175 degrees C). In a large bowl, mix together the cookie crumbs, confectioners' sugar and 1/3 cup cocoa powder. Add melted butter and stir until well mixed. Pat into the bottom of a 9 inch springform pan. Bake in preheated oven for 10 minutes; set aside. Increase oven temperature to 450 degrees F (230 degrees C).
2. In a large bowl, combine cream cheese, white sugar, 1/4 cup cocoa and flour. Beat at medium speed until well blended and smooth. Add eggs one at a time, mixing well after each addition. Blend in the sour cream and Irish cream liqueur; mixing on low speed. Pour filling over baked crust.
3. Bake at 450 degrees F (230 degrees C) for 10 minutes. Reduce oven temperature to 250 degrees F (120 degrees C), and continue baking for 60 minutes.
4. With a knife, loosen cake from rim of pan. Let cool, then remove the rim of pan. Chill before serving. If your cake cracks, a helpful tip is to dampen a spatula and smooth the top, then sprinkle with some chocolate wafer crumbs.
TIPS:
If the top of your cheesecake cools too fast and cracks, you can also cover those unsightly blemishes with fruit (like strawberries or raspberries) or a chocolate whipped cream (use real whipped cream, you'll taste the difference)
This also makes a YUMMY cheesecake if you substitute Kahlua (or any coffee liqueur) or Grand Marnier (any good Triple Sec will do, I suppose) for the Irish Cream. Amaretto or Frangelico might also be nice, but I haven't tried them.
Enjoy!
February 10, 2006
Recipe Time!
There are few things I love better (to eat) than Piggy, and pork chops, especially the thick-cut boneless kind are always on the menu at our house. Here's a great recipe with a double shot of pork, and which can be made either in the oven or on the grill:
Pork Chops Stuffed with Smoked Gouda and Bacon
INGREDIENTS:
2 ounces smoked Gouda cheese, shredded (or any other cheese you're a fan of)
4 slices bacon, cooked and crumbled
1/4 cup chopped fresh parsley (also yummy with chives or scallions!)
1/8 teaspoon ground black pepper
2 (2 1/4 inch thick) center-cut pork chops (bone-in or boneless)
1 teaspoon olive oil
1/4 teaspoon salt
ground black pepper to taste
DIRECTIONS (for the grill):
1.Preheat an outdoor grill for medium heat.
2.In a small bowl, combine the cheese, bacon, parsley, and 1/8 teaspoon black pepper.
3.Lay the chop flat on cutting board, and with a sharp knife held parallel to the board, cut a pocket into the pork, going all the way to the bone(if boneless, slice toward fat side, leaving fat intact), but leaving the sides intact. Stuff cheese mixture into pocket, and close with a wooden toothpick. Brush meat with oil, and season with salt and more black pepper.
4.Lightly oil the grill grate. Grill over medium heat for 5 to 8 minutes on each side, or until pork is done. Be careful not to overcook!
DIRECTIONS (for the oven):
1. Preheat the oven to 325 degrees F (165 degrees C). Grease a shallow baking dish.
2. In a small bowl, combine the cheese, bacon, parsley, and 1/8 teaspoon black pepper.
3. Lay the chop flat on cutting board, and with a sharp knife held parallel to the board, cut a pocket into the pork, going all the way to the bone (if boneless, slice toward fat side, leaving fat intact), but leaving the sides intact. Stuff cheese mixture into pocket, and close with a wooden toothpick. Brush meat with oil, and season with salt and more black pepper.
4. Bake for 20 minutes in the preheated oven, or it may take longer if your chops are thicker. Cook until the stuffing is hot, and chops are to your desired degree of doneness. Garnish with fresh parsley and serve.
March 06, 2006
Yummy Links!
This week's Danish-Themed Carnival of the Recipes is up!
Go check it out!
Also, one of my favorite bloggers is back after a long hiatus, Go check out Deb of Eat Your History, a blog about food and its place in history.
May 25, 2006
Grantsmanship be damned.
I have two grants going out for June 1, but I suppose I can take 5 minutes and post a yummy new recipe.
I just found this one, and it is yummy and summery, perfect for the holiday weekend!
Dill Pickle Potato Salad
3 pounds potatoes (about 8 medium sized)
6 hard cooked eggs, chopped
3 celery ribs, chopped
6 green onions, chopped
2 medium dill pickles, finely chopped
1.5 cups Mayonnaise
1/4 cup dill pickle juice
4.5 tsp prepared mustard
1 tsp celery seed
1 tsp salt
1/2 tsp pepper
Place potatoes in a dutch oven and cover with water. Bring to a boil. Reduce heat, cover and simmer for 20-30 minutes or until tender. Drain and Cool.
Peel (if desired) and cube potatoes, place in a large bowl. Add eggs, celery, onions, and pickles.
In a small bowl, combine mayonnaise, dill pickle juice, mustard, celery seed, salt, and pepper. Pour over potato mixture and mix well. Cover and refrigerate for at least 4 hours.
Yield: 8-10 servings
May 26, 2006
Whaaa? Oh. Yeah. Sure. Well, It is Friday....
| You Are Dublin Mudslide Ice Cream |
 |
October 23, 2006
Gorram Snotnose...
...Me.
I have the cold from hell, which may even be the flu. It's no joke when I tell people that traveling makes me ill. Because of the RA and the mild immunosuppression from the drugs, I get whatever's going around, the first AND the second time. So instead of sitting on my office working on grant applications, dealing with my students, etc. I am sitting on my couch drifting in and out of consciousness in front of SportCenter, occasionally being able to smell the pot roast I have in the crockpot for tonight.
I suppose I should share the recipe. It being the easiest pot roast ever. Goes together in 5 minutes in the AM and cooks all day while you're out.
Easy CrockPot PotRoast ala TJ
Crockpot
Roast of your choice, suitable for pot roast. I have no idea what cut of meat is in there today
4-6 small to medium potatoes
2 handfuls baby carrots (about 1.5 cups chopped carrot eq.)
1 "potbelly" (large can) of Trader Joe's Rich Onion Soup
large dash Worcestershire sauce
Garlic powder
Salt and pepper to taste
(you can also add about 1/2 cup red wine to the liquid, if you like)
Place the roast in the crockpot. If it has a predominate "fat side", place the fat side up. Pour the can of soup over the roast. Add up to 1 cup water to the can to wash out any remaining onions, and add to the crockpot. Add worcestershire sauce (and wine if desired), garlic powder and salt and pepper. Give the liquid a bit of a stir to mix elements.
Wash potatoes thoroughly, and remove any eyes. Cut in half and drop potatoes around roast so all are covered with liquid. Add carrots.
Cover and set crockpot to low. Let cook 8 hours.
June 13, 2007
I haven't posted a recipe in a while
This post at Christina's made me think of one of my favorites. Very simple, and a completely different take on a vegetable most people don't like much.
Brown Sugar Asparagus
3 tablespoons butter or margarine
2 tablespoons brown sugar plus a pinch for garnish
2 pounds fresh asparagus - cut into 2" pieces
(about 4 cups, discard woody ends)
1 cup chicken broth
In a skillet at medium-high heat, stir butter and brown sugar until brown sugar is dissolved. Add asparagus; saute for 2-3 minutes, tossing to coat with sugar and butter. Pour in chicken broth and bring to a boil. Reduce heat to medium-low; cover and simmer for 8-10 minutes. Remove lid and cook, uncovered, until liquid is reduced by half. Garnish with a pinch of brown sugar. Serve immediately.
There's a funny story behind this one. The recipe actually comes from the little tag attached to the bunch of asparagus in the store. I tried it on a lark, and now this is the ONLY way hubby will eat asparagus.
July 09, 2007
Yummy!
More recipe blogging. Puke's had a good special on corn last week, so we roasted a bunch tonight, using this recipe:
Aw Shucks Grilled Corn
(originally from Rick Browne's Barbecue America TV Cookbook, found here)
6 ears fresh corn, with shucks on
1 cup mayonnaise
1/4 cup softened butter
1 teaspoon brown sugar
2 tablespoons fresh lime juice
2 tablespoons dried ancho chile powder
1/2 teaspoon garlic powder
fresh ground pepper
1. Soak the corn in salt water for several hours to get the shucks moist. (Add 2 Tbs. salt to 1 gallon of water).
2. In a medium bowl combine mayonnaise, butter, sugar, lime juice, chili, garlic and pepper until the ingredients are well mixed.
3. Grill the corn, with the shucks intact, over hot coals or high gas burners on the grill, turning frequently, until done, about 30 minutes. The shucks will often turn dark/black but will protect the corn.
4. Peel the shucks back, one at a time, until most of the corn is exposed and then remove the silk. With a pastry brush lavishly coat the corn with the spiced mayonnaise-butter mixture.
5. Serve with shucks tied together like a handle.
We used regular dark chili powder, and no brown sugar or lime juice (I was out of limes), and I added Pappy's and onion powder to the mix. Yummy!
September 28, 2007
Munchies that give you the munchies
Magic Brownies are for amateurs. Check out these scooby-doobie snacks:
Federal agents said Thursday that they shut down a factory that made marijuana-laced barbecue sauce, chocolate-covered pretzels and other "enhanced" snacks intended for medical users of the drug.What a great way to get people to keep buying your products!The Drug Enforcement Agency said it arrested three people Wednesday and is looking for a fourth who operated Oakland-based Tainted Inc.
Agents also seized 460 marijuana plants and other laced products including candy bars, cookies, marshmallow pies, ice cream, peanut butter, jelly, energy drinks and "Rice Krispy treats."
Tainted Inc. was launched by Michael Martin, 33, of El Sobrante as a small operation that made laced chocolate truffles. When it was raided Wednesday, the company was shipping products to medical marijuana dispensaries throughout California and in Seattle; Vancouver, British Columbia; and Amsterdam. [--emphasis mine, Ed.]
January 28, 2008
Green Eggs and Ham Tomato Soup
So on Saturday we did a bit of yard work. The Bougainvillea fell over on our gorgeous (and still producing!) yellow tomato plant, effectively killing it. Once we removed the bougie back to upright status, we found dozens of small green tomatoes still growing on the dying vine. So we harvested at least 4 quarts of beautiful green tomatoes.
Ironically enough, fried green tomatoes is one of the FEW fried, Southern dishes that I DON'T like. So I went to Chef Google to find some different recipes for using up the garden's bounty. One of the first that I turned up was this recipe for Green Tomato Soup. I made this last night, and by all accounts it was a BIG winner.
Believe it or not. Originally found here. The recipe below contains my modifications.
Ingredients
2 tablespoons extra-virgin olive oil4 oz Cubed Pancetta (1/2 cup)
1 1/2 cups thinly sliced scallions (from 1 bunch)
1 tablespoon crushed garlic
1 pinch dried bay leaf pieces, scattered in the oil
2 lb green unripe tomatoes, chopped into bite-sized chunks
2 cups low-sodium chicken broth
1 cup water
1/2 teaspoon salt
1/4 teaspoon black pepper
Garnish: fat-free plain yogurt
Preparation
Heat oil in a 3-quart heavy saucepan over moderate heat until hot but not smoking, add bay leaf bits, then cook pancetta, stirring occasionally, until beginning to brown, 1 to 2 minutes. Add scallions and garlic and cook, stirring occasionally, until scallions are tender and lightly browned, 6 to 8 minutes. Add tomatoes, broth, water, salt, and pepper and simmer on medium heat, partially covered, until tomatoes are tender, 15 to 20 minutes. Season with salt and pepper to taste if necessary.
To serve, put a dollop of yogurt in the bottom of the soup bowl and ladle soup over the top. Yum.
Makes about 6 bowls of soup.
Multiple possible variations on this one, including a lower-fat meat (like turkey bacon, ham, or low-fat sausage), and sour cream or creme freche for the garnish. Also, some people dislike the broth to stuff ratio, so add more broth if you feel the soup is too chunky. Finally, if the soup seems too tart, add one tsp. sugar (or one packet sweet n low or splenda) to the pot to cut the acidity from the tomatoes. DO NOT use Equal.
February 07, 2008
Bacon IS meat candy
Ingredients:
1 lb bacon (not thick-cut)
1/4 cup brown sugar
Directions:
1. Pre-heat oven to 350 degrees F.
2. Slice bacon into 1/2-inch strips and dredge in brown sugar until thoroughly coated.
3. Crumple aluminum foil to allow for grease drainage and place it on a baking sheet. Lay out the bacon on the foil making sure not to overlap pieces.
4. Bake until crispy. Allow to cool and harden before serving.
Oh yeah. Perfect with some bacon vodka.
Or try this.
February 12, 2008
Free Pancakes!
Do you love IHOP pancakes? Do you support the work of children's hospitals?
If the answer to both questions is YES, have I got a deal for you!
Today, February 12 is IHOP's celebration of National Pancake Day, and today, from 7am to 10pm they are offering a free short stack (3) of pancakes to anyone who drops in. All they ask is that you consider making a donation to the Children's Miracle Network.
That's a damn good trade: free pancakes for helping sick kids.
I suspect I see an IHOP in my future tonight...... YUMMY.
h/t wRitErsbLock
Yes, comments are still down. Which sucks.
July 22, 2008
Summer Reruns
One of my favorite things about summer is that my schedule is less crazy and I have the flexibility to do things I usually can't in the winter: catch up on TV, knit and crochet, read good books, and especially, cook.
Hubby has been working like a fiend in the yard getting all the detritus up from this weekend's festivities and mulching it with the mini chipper of doom. So I thought I would treat him with one of his favorites, Stuffed Peppers. I hate 'em, but I'll totally eat the filling and we had some beautiful green peppers I picked up at the Fresno State farm market last week when we were in town that I needed to use.
My stuffed pepper recipe is the easiest ever (especially when you use pre-cooked rice from Trader Joe's), so it makes a quick summer rerun. And a very happy hubby, too!
Go here to see just how awesomely easy it is!
September 24, 2008
I never thought I'd meet a piece of bacon I didn't like
But then I found THIS
And seriously, y'all, yuck!
I love bacon, and I love my Tiara sisters, but I refuse to combine the two and wear the "Pork Princess" Tiara....

November 09, 2008
Heaven, thy name is Bacon Apple Pie
A few weeks ago Instapundit posted an item about a bacon apple pie featured at Amazon's al dente blog. The pie, which was originally created and made by Eli, of the EliCooks blog, is a somewhat traditional apple pie, except for the bacon crumbles inside and the lattice top made of bacon.
Ba-con. Mmmmmmmm. Here at Not Exactly Rocket Science, bacon is our favorite food, hands down. Nothing beats bacon for tastiness or indulgence. In fact, I prefer to eat bacon stuffed bacon with a side of bacon for breakfast if I can. Yum!
Bacon is Meat Candy.
And don't tell me about the cholesterol and all that. I know that. That's why I only actually eat bacon every so often, and it is truly a special treat.
Anyway, as my birthday is coming up, and bacon is well and truly my favorite treat, I thought I'd give this one a shot in the hopes of coming up with some birthday non-cake sweets. I modified the original recipe a bit, as I don't have any Cinnamon Bacon or scotch in the house and we're not big apple/maple combo fans....(see the recipe at Eli Cooks)
Here's my version, based on Eli's recipe:
CTG's Happy Birthday Bacon Apple Pie
1 9 in pie crust (I ended up making 2 pies because I had enough filling left over, YMMV*)
4 strips bacon, cooked crispy (NOT burnt) and crumbled (I used the microwave)
5-7 medium to large tart apples, peeled, cored and sliced (I used Pink Ladies)
1/4 cup brown sugar
1/4 cup white sugar
1 tsp Pumpkin Pie Spice (the original calls for nutmeg and cloves separately, but PPS is nutmeg, mace, cloves, and cinnamon. WAY easier)**
1/2 tsp cinnamon **
1/4 tsp vanilla extract
2 Tbsp plus 1 tsp cornstarch
2+ Tbsp Butter, in small chunks
6-12 slices bacon***, halved lengthwise (make sure you get some fat in each half!)
*Your Mileage May Vary
** PPS and cinnamon are pretty subjective tastes, add more or less depending on your preference. Taste an apple slice once everything is mixed and before adding to the crust.
*** you'll need 6-7 slices (12-14 halves) for the lattice of one pie, about 12 slices for 2 pies
Note from Eli: The quality of the bacon here matters. You want a bacon with a good flavor when fried and eaten alone, because that's almost what you have on top of the pie. I should also admit that I used store-bought pie crust. Honestly, I think the stuff you buy in rolls in the fridge case is almost as good as home made and a hell of a lot easier.
I concur. Save some time, buy a good pie crust. Trader Joes has a fine one.
Preheat the oven to 350 F. Spread the pie crust in a 9 in pie pan and leave about 1/2 inch overhanging edges. Sprinkle about 1/3 of the bacon crumbles on the bottom of the crust.
Peel (if desired), core, and slice the apples. Mix together the apple slices, remaining bacon crumbles, brown and white sugar, PPS, cinnamon, salt, vanilla, and cornstarch. Spread over the bacon in the pie crust. Break the butter into small chunks and place on the top of the apple mixture, spread evenly apart.
Butter plus bacon may be too heavy duty for some. You can leave this out altogether if it seems too fatty. But the pie has a tendency to be drier than most because of the lack of a true top crust, so the butter helps. If you like the butter, be sure to add enough. 2 Tbsp may be less than optimal for your pie.
Arrange the half-strips of bacon over the top of the pie crust in a lattice, then fold the edges of the pie crust over the bacon and crimp. This is crucial because the bacon will shrink as it cooks.
Another Note from Eli: The bacon lattice really doesn't want to stay tucked in around the edges of the pie. Be sure to include extra bacon sticking off the edge of the pie and tuck it down the inside of the crust to help mitigate this. Also, having a larger rim of pie dough to extend a bit further toward the center of the pie would probably help.
Place the pie tin on a cookie sheet and bake in the center of the oven for about 50-60 minutes, until the bacon on top is crisp, the crust is golden-brown and apple slices are tender. My two pies, on a dark cookie sheet, took about 55 minutes and were done perfectly. Again, YMMV*.
My yield was two pies, 6-8 slices each, from the above recipe. Try it warm with GOOD French Vanilla ice cream. You'll think you died and went to heaven.
Be sure you have enough bacon. One package wasn't enough for lattice for two pies, although the recipe made enough filling for two (or perhaps I had too many apples) but there should be plenty of slices in one package of bacon for just one pie.
Sorry for the lack of pix. The pie came out a bit ugly without enough lattice on this go-round. Maybe next time!
January 29, 2009
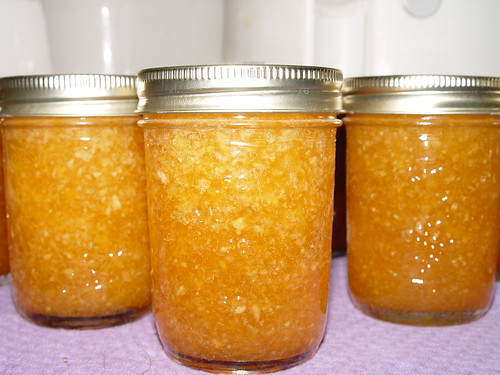
Pictures and stuff
Lots of new pics on the Flickr page. Including Flea performing with the Caltech Jazz bands (and our own Kjerstin, too!) and lots of glorious jam/marmalade food pRon.
Like this:
May 16, 2009
A furious alchemy
I got this amazing book for Christmas. Ever since, I have been addicted to the delicious science of jam-making.
There's really something terribly soothing about looking into the pink, frothy abyss of boiling mashed strawberries and making your kitchen smell like Jamba juice.
And it's reasonably easy on the hands.
Those of you who were around before the RA really took over remember how much I love to bake. Perfecting the subtle chemistry of a light cake or a creamy cheesecake has the same delights. Unfortunately, baking requires a lot more lifting, pouring, and manual dexterity-type of prep.
But no, I am NOT giving you my chocolate Bailey's cheesecake recipe or my no-fail Red Velvet Cupcakes. Someday I will bake again, and those puppies are all mine.
So while I can't bake like a fiend, my inner domestic goddess satifies herself with jam, 3 or 4 little jars at a time.
Today's experiment: Strawberry Kiwi.... So far so good. Pictures later!